Tuesday, 30 June 2009

Bring the Model UN to your classroom - (End-of-year-Series Pt.4)

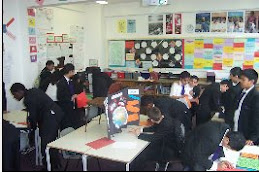
This may be shamelessly Citizenshipy but 'Model UN' is my favourite summer activity. Using materials from Global Classrooms I set out my classroom as a mini-UN conference. Each student is given a country placard and they represent that country in all debate. Instead of ordinary register we do a country 'roll call' ("Delegate for china?" "Present!") and we use the rules of UN debate to discuss topics and head towards a resolution.

This involves keeping a speaker's list and deciding how long each person will speak for:


Students also have time to negotiate individually and convince others of their propositions. This bit involves a free-for all of discussion and debate:

It's one of the most exciting parts of the year and students LOVE being given an adult way of discussing things. While some subjects might not find this exact format suitable I would encourage you to think about other settings you can simuate. Maths at a model stock exchange? Scientists at a science policy debate? Usually teachers are only limited by their imagination....

Monday, 29 June 2009

Creating Board Games - (End-of-year-Series Pt. 3)


Helping students make revision board games is a fun end-of-year activity that helps consolidate learning from the past year. I use a powerpoint presentation to introduce the concept to students along with a letter explaining the activity purpose.

Online there are plenty of templates to support student imagination- for example I found this racing car example at Jeff Ertzberger's website.

At the end of the project I laminate a few of the best ones to use the following year with disengaged students. One student even managed to create a 'poker style' revision game with a card table that became quite a hit during the final revision weeks!

Friday, 26 June 2009

Make (don't watch) videos - (End-of-year Series Pt. 2)

End-of-year videos become boring for students, they traipse from classroom to classroom like they are in one great big cinema. The act of watching films is good once around but after a while they start to act like they are stuck on a never-ending plane ride and I don't blame them.

To be alternative get hold of a video camera and get them to make their own films. I had one video camera for an entire class of Year 9 boys. I gave them one hour, the camera and told them to make an educational video about STIs (we'd been covering sex ed). They came back with the most incredible - already edited on the camera - movie. Some parts are factually inaccurate but the narrative is there and they are savvy with their use of shots and editing. I now use the movie in other lessons to see if students can spot the mistakes.

Another example is from a few years ago when students made a video about knife crime. This took slightly longer but this one is allowed to be on youtube so you can see their work.

Thursday, 25 June 2009

Make A Museum in Your Classroom (End of Year Series)

Inspired by American school Science Fairs, I use exhibitions as a way of getting students excited about research and investigation. Topics have included: Environment, Teen Life, Demography & Domestic Life. In teacher training people have created exhibtions on respiration, accounting procedures and refugees.

I build up to creating our museum exhibition over a few lessons. (The full Scheme of Work can be found here - this one is environment themed)


Lesson 1
:
We start brainstorming what a good exhibition looks like, by showing students some examples from past lessons and online. We then brainstorm possible questions and pick the ones we will investigate. I also add in the most important part here: each display must have a display board with words and pictures AND each team must create an interactive model that explains some part of the answer to their question.


Lessons 2 & 3:
Students research and prepare for 'creation' day. I give each group ONE lesson only to complete the visual parts of their display. On the day they may bring ready-made items in, e.g. written displays or pictures, to stick onto their card, but they will only have 50 minutes. To prepare students for this I give them decision cards. On the cards each team makes decisions about the team member responsible for the model, pictures, writing, etc. [This lesson was observed during our OFSTED and the inspectors loved it because it gave 'structured independence' to the students].

Lesson 4:
Creation day!

Lesson 5
: The museum bit. So, on the day, students have 10 minutes to set up. Each stand leaves one pupil at the display, ready to explain to passers-by. The rest of us go out into the corridor - with bags and coats if necessary - and we line up. I explain that we are on 'a trip' and that students have worksheets to fill in. "You must treat the museum with respect as you are representing our school and I don't want visitors going away thinking badly of school" I say (cue much good-natured groaning here...). Students go into the classroom, look at each other's exhibitions, ask questions and complete their worksheet. Because every student must complete their worksheet fully, students rotate who stays with the display and who is moving around.

As long as it is set-up properly with good instruction, I have
never had this lesson go wrong. Everyone is on-task and enjoying themselves.

Final note: Make sure you have time to pack away or let the next teacher know that you will be late!

Wednesday, 24 June 2009

Forthcoming Feature Announcement.....

The End-of-Year 7-Part Series starts tomorrow!
The last few weeks of term can be tricky to manage. Students are being pulled out for extra-curricular activities, kids are high from post-exam excitement, teachers are exhausted and the weather takes its toll on shabby, high-up, no air ventilation classrooms. The joys of inner-London.

Over the last few years I've trialled various end-of-year projects with students and will be sharing 'How To' guides for the most successful over the next 7 days. Starting tomorrow with: Make a museum in your classroom.

Website of the Week; Dustball Checker*

Many classes I teach are graded solely on coursework. With the internet so readily available students will occasionally turn to 'cutting and pasting' when they have left assignments to the last minute, or if they don't understand the work. Clamping down on this has been one of my goals this year.

The Dustball Plagiarism Checker is a brilliant tool for doing this. On the first page you copy and paste student work into the box. It seems to carry any amount of text and even if the original document has pictures it works around them.

After this, hit the 'check' button and a new page will pop up with a selection of sentences and the verdict - 'ok' or 'suspected plagiarism'

Finally, and this is my favourite bit, by clicking on the 'possible plagiarism' bit you get taken to a google page showing the websites. You are then able to present the sudent with the website that the text was taken from. It's also worth checking these as sometimes there are a LOT of hits with the same sentence - in this case, it's simply that the topic means a student is likely to write that combination of words. If there's only one hit returned, and it matches a lot of the work, then it's likely to be plagiarism.

* A quick note: All of the websites I write about are genuinely ones I use in my classroom - they are not sponsored links or anything like that. I write about them mostly so I have a quick place to get the link from. This does mean that some weeks I won't write about websites because I don't have any new ones.


Tuesday, 23 June 2009

Planning for Parent's Evening

Many schools have now done away with Parent's Evening but if you are in the fortunate position of being involved in them here is my number 1 tip for an effective parent meeting.

Have something for parents to take away with them

I create small pre-printed cards with information pertinent to students studies that I can give to parents. At the top it has the topics we covered this year (this helps get over the: "So what is citizenship?" question but also gives a structure to topic and helps parents feel secure in their knowledge of the subject). I then put a tick-list of things that people can do well - e.g. active participation, evaluation of topics, questioning skills and I will tick the one the student did best and explain why I ticked this to the parent.

Finally, there is a space at the bottom. I ask the student what they think went well and we write this in. I then add anything I want them to work on next year, along with some encouragement, before signing and passing over.

A slightly more 'serious' version was made by a fantastic colleague of mine, Louise Baldwin. She created a 'science' card inclduing space for various module grades. She then talked through the system with parents - many of whom did not speak English well and appreciated the simplicity of the card and the fact they were given something to read and follow in their own time.

This system works for three reasons. 1. Parents get a lot of information over an evening so it's helpful for them to have something to reflect on when they get home - especially if English is a second language. 2. It means every kid has a record of what they did best which makes them more likely to feel efficacious about the subject. And, finally, 3. Because the slips are printed on coloured card they look like certificates and everyone likes being given a certificate - it's human nature!